
This site runs ads and generates income from affiliate links. Read my disclosure policy.
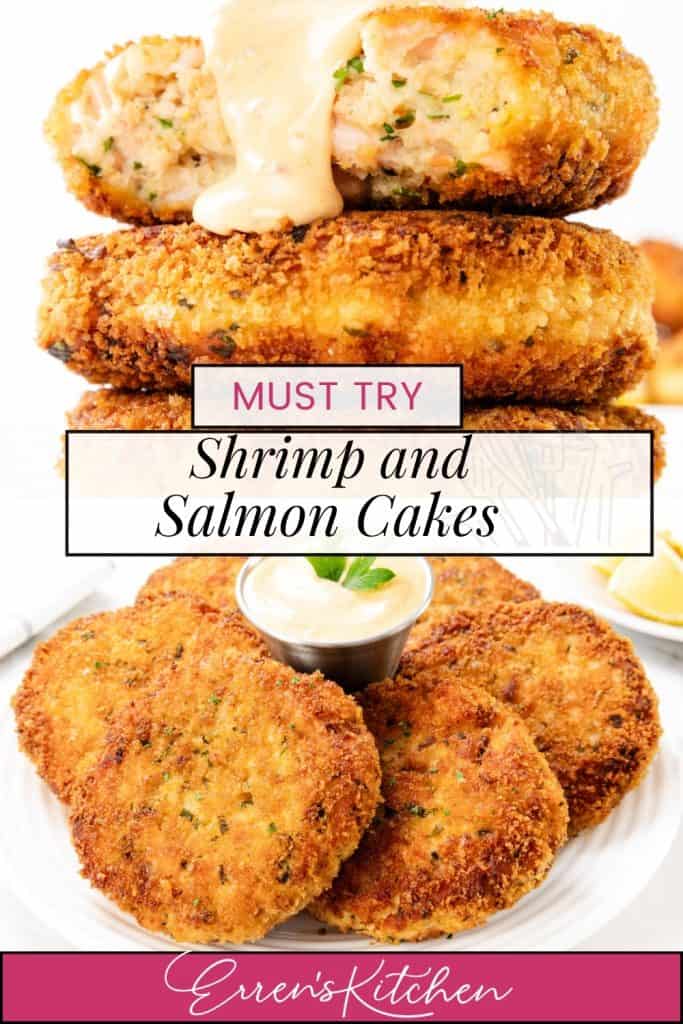
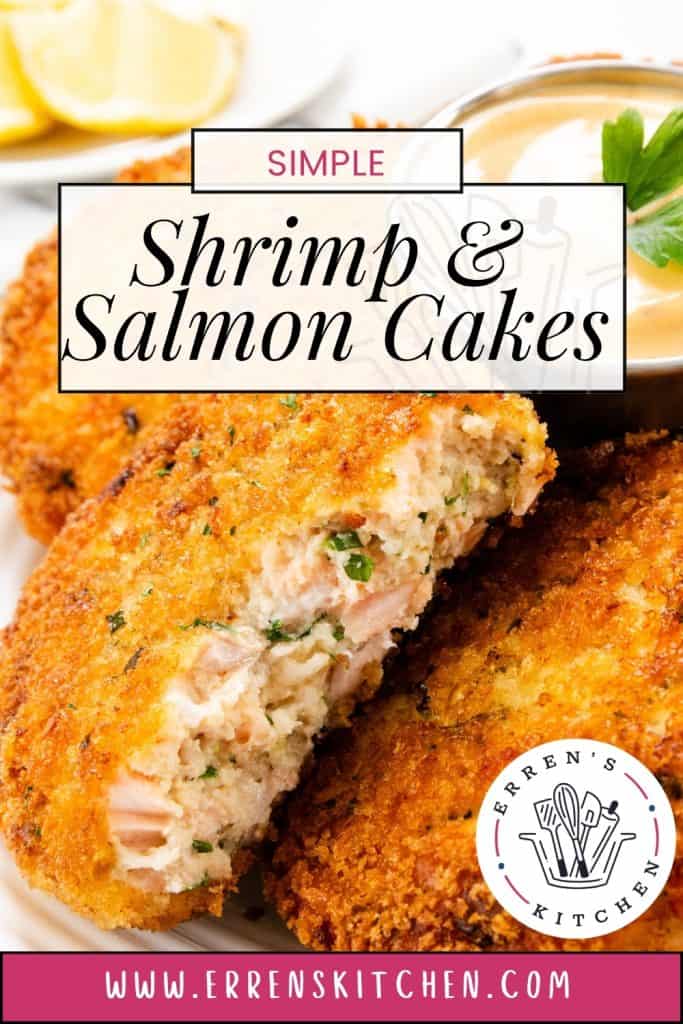
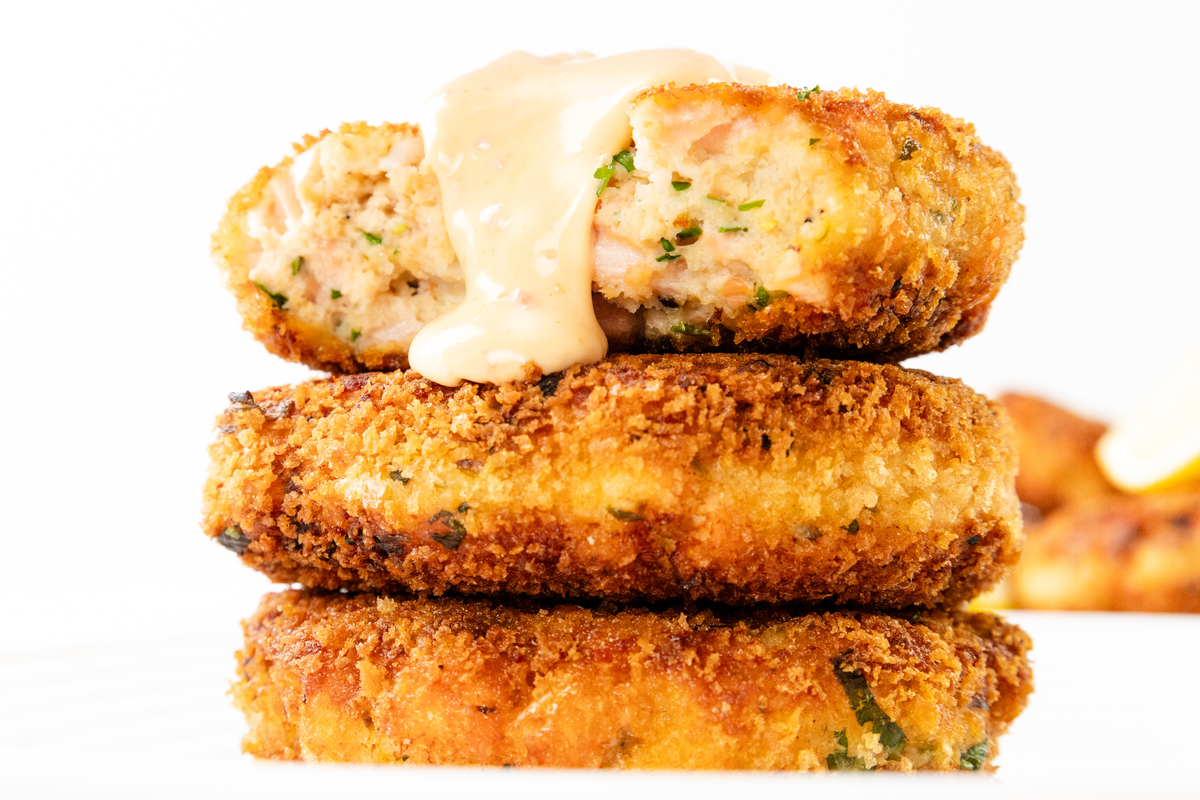
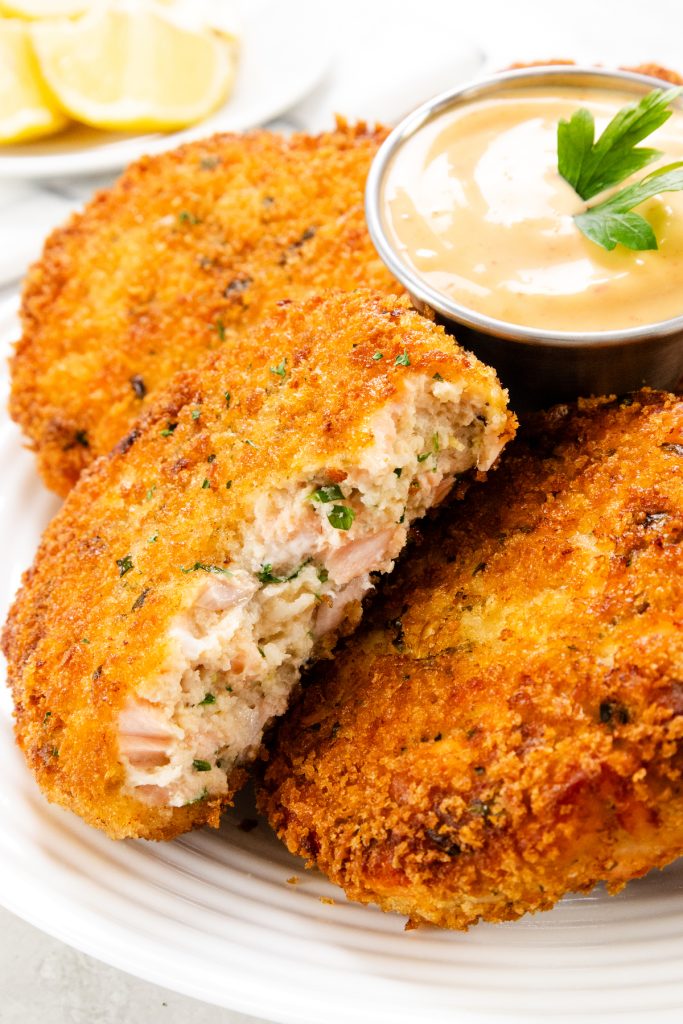
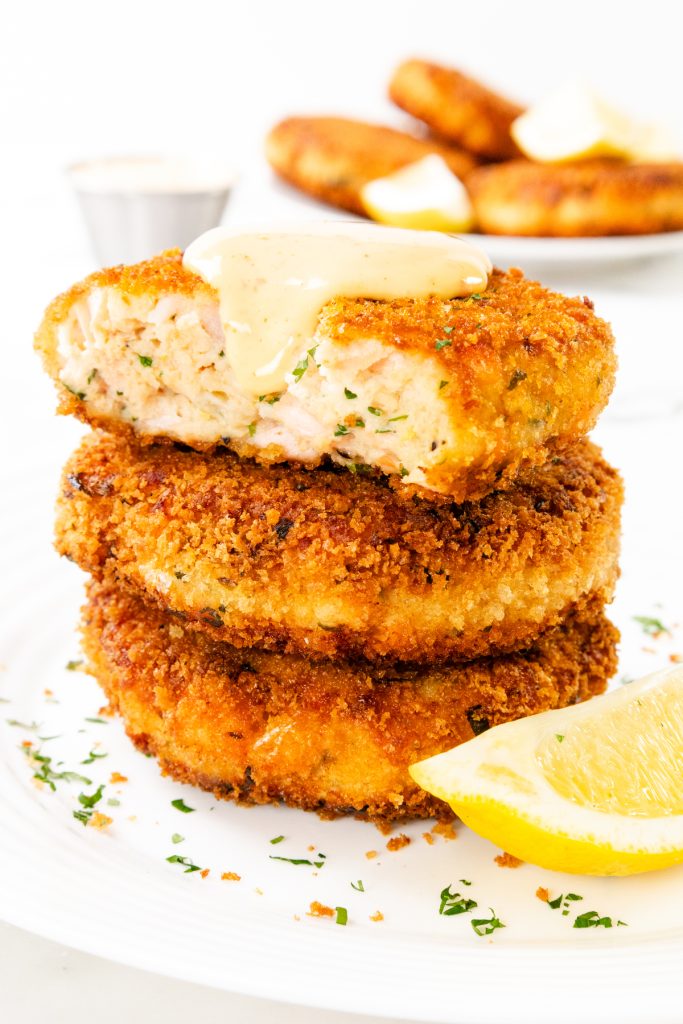
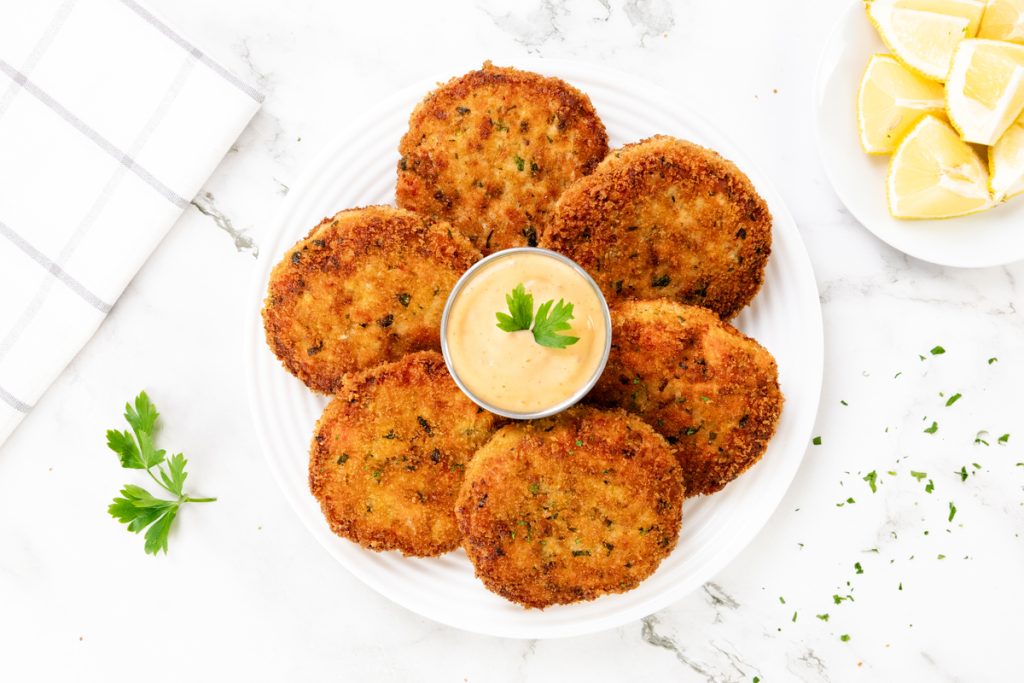
Golden and crisp on the outside with a tender, flaky center, these shrimp and salmon cakes are fresh, bright, and served with a zesty spicy aioli.
Know Before You Scroll

What You’ll Need
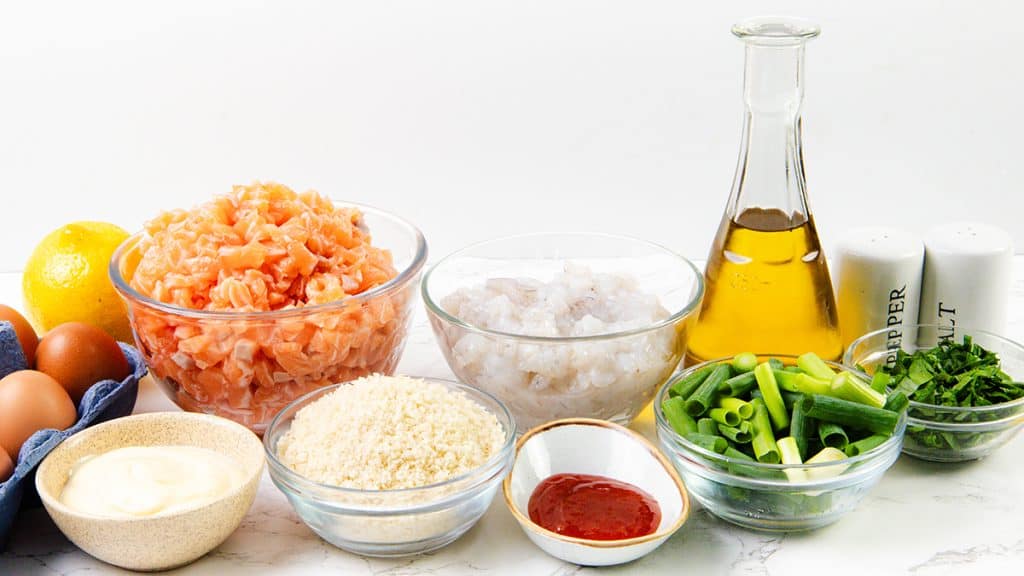
Shrimp, salmon, eggs, panko breadcrumbs, lemon, green onions, parsley
Flavor Profile
Fresh, lemony, lightly rich, and savory with a crisp panko coating
Difficulty Level
Moderate, but very doable
Equipment Needed
Food processor, mixing bowl, parchment-lined tray, large skillet
Top Tip
Don’t over-process the seafood — a little texture is what makes these feel fresh and flaky.
Time-Saving Tips
Shape and chill the cakes up to a day in advance.
Ingredient Swaps
Use all salmon or all shrimp if preferred.
Why This Recipe Works
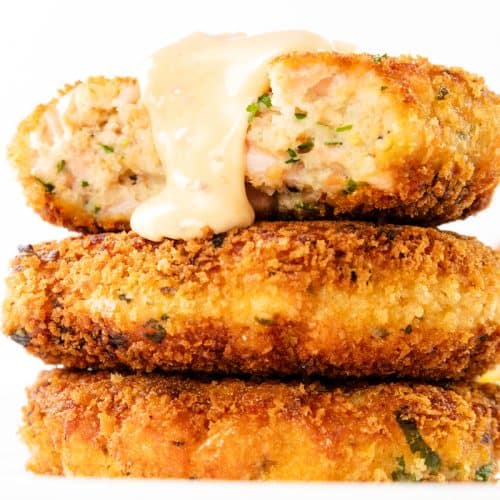
I wanted these to taste like seafood cakes, not breadcrumb cakes with seafood hiding somewhere in the background. The trick was pulsing only part of the shrimp and salmon into a coarse paste, then folding in the rest in chunky pieces. That gives you enough natural binding to hold everything together without turning the texture dense or bouncy.
The chill time matters, too. It firms up the mixture before it hits the pan, so the cakes are easier to flip and the panko has time to set into that crisp golden coating. You get a cake that’s light, fresh, and sturdy enough to serve for dinner — with just enough spicy mayo to make things interesting.
These golden shrimp and salmon cakes are crisp on the outside, tender and chunky in the center, and full of fresh lemon, herbs, and green onion. Serve them with spicy mayo for an easy dinner, appetizer, or no-bun seafood burger situation.
Ingredient Notes
Seafood
Best Choice
Fresh raw shrimp and skinless salmon give the cakes the cleanest flavor and best texture. Chop small enough to mix evenly while keeping some texture.
Substitutions
Frozen shrimp or salmon can work; thaw fully and pat dry first.
Panko Breadcrumbs
Best Choice
Panko keeps the inside lighter and creates a crisp, golden coating.
Substitutions
Regular breadcrumbs work, but the coating will be softer and denser.
Lemon, Green Onion, and Parsley
Best Choice
These keep the cakes bright and fresh so the seafood still shines.
Substitutions
Use chives or dill if needed, and adjust lemon to taste.
Where to Find
Produce section.
Spicy Aioli
Best Choice
Mayonnaise gives the sauce a rich, smooth finish that pairs well with the crisp cakes.
Substitutions
Greek yogurt makes a tangier lighter sauce; use your favorite chili sauce instead of sriracha.
Where to Find
Condiment aisle.
You can find the full, printable recipe at the top of this post, but you can read the detailed instructions with photos for each step below.
Step By Step Instructions
1
Build the Base
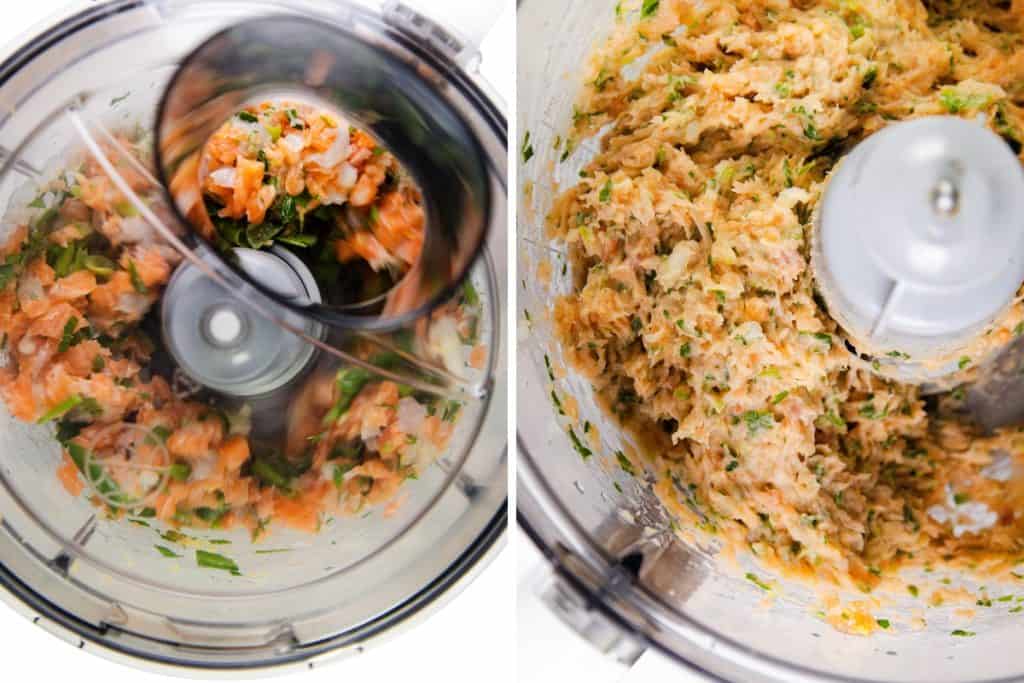
Add half the shrimp, half the salmon, the green onions, lemon zest, and half the parsley to a food processor. Pulse until the mixture forms a coarse paste. It should look textured, not completely smooth.
2
Mix the Cakes
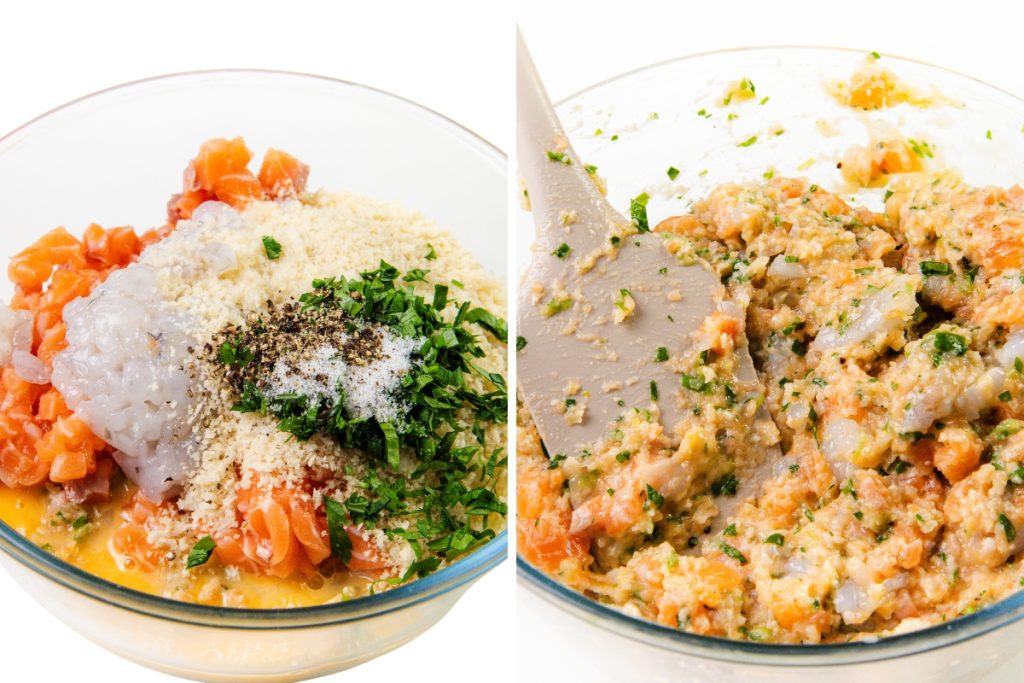
Transfer the mixture to a bowl. Add the remaining shrimp and salmon, ¾ cup panko breadcrumbs, beaten eggs, lemon juice, remaining parsley, salt, and pepper. Mix gently until just combined. The mixture should hold together when pressed but still feel light.
3
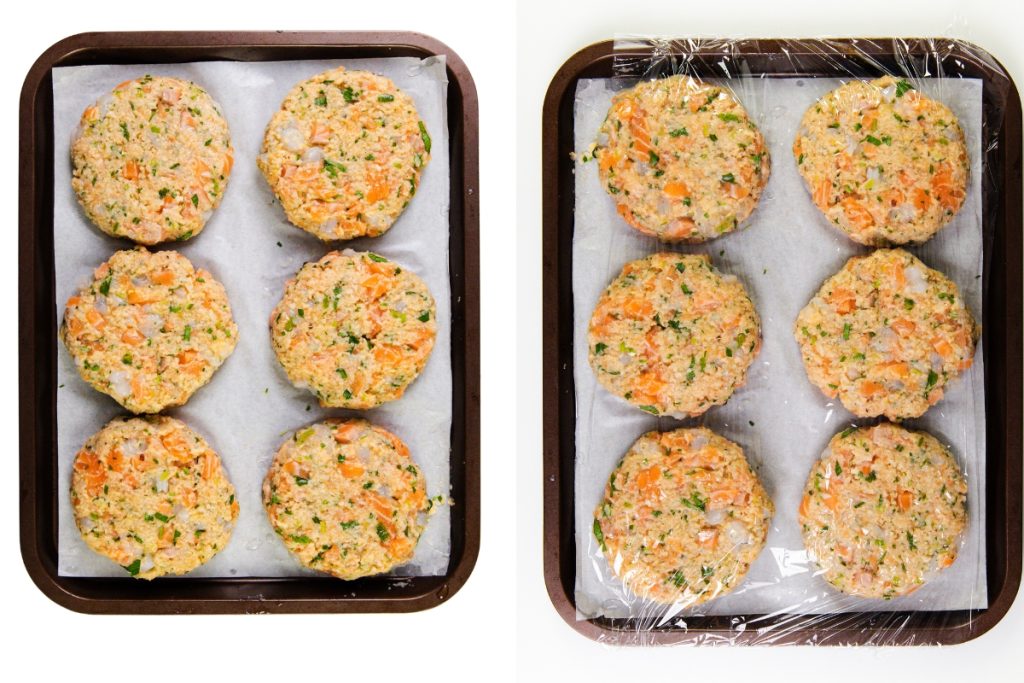
Shape and Chill
Form the mixture into 6 patties about 1 inch thick and place them on a lined tray. Chill for 30 minutes, or until firm to the touch.
4
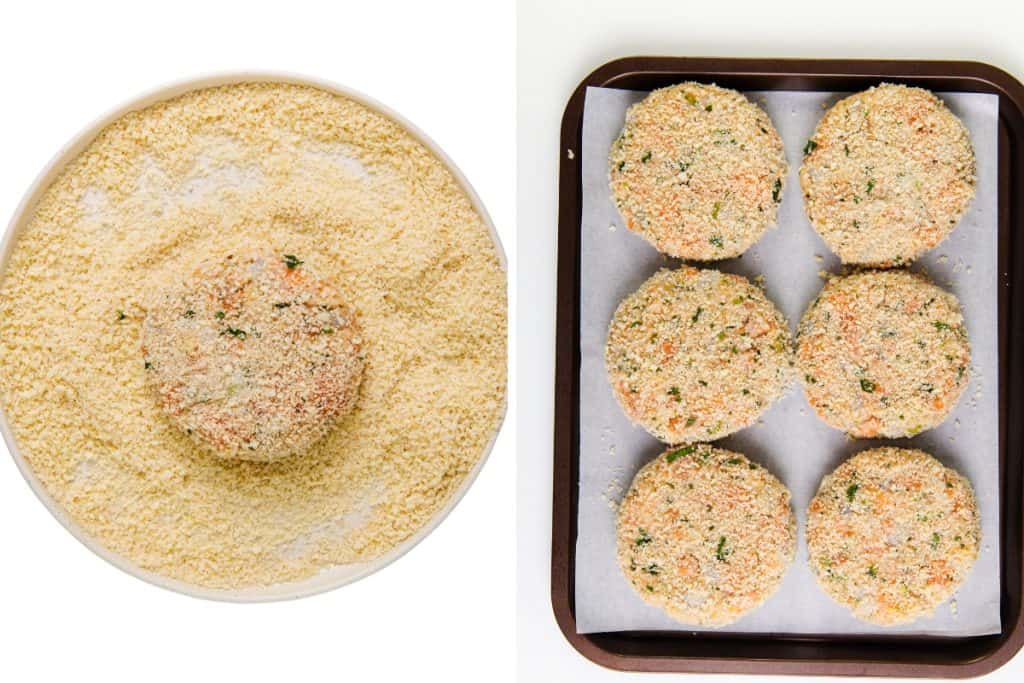
Coat the Cakes
Press each chilled cake into the 1½ cups panko breadcrumbs, coating both sides evenly. Shake off the excess so the coating stays light and crisp.
5
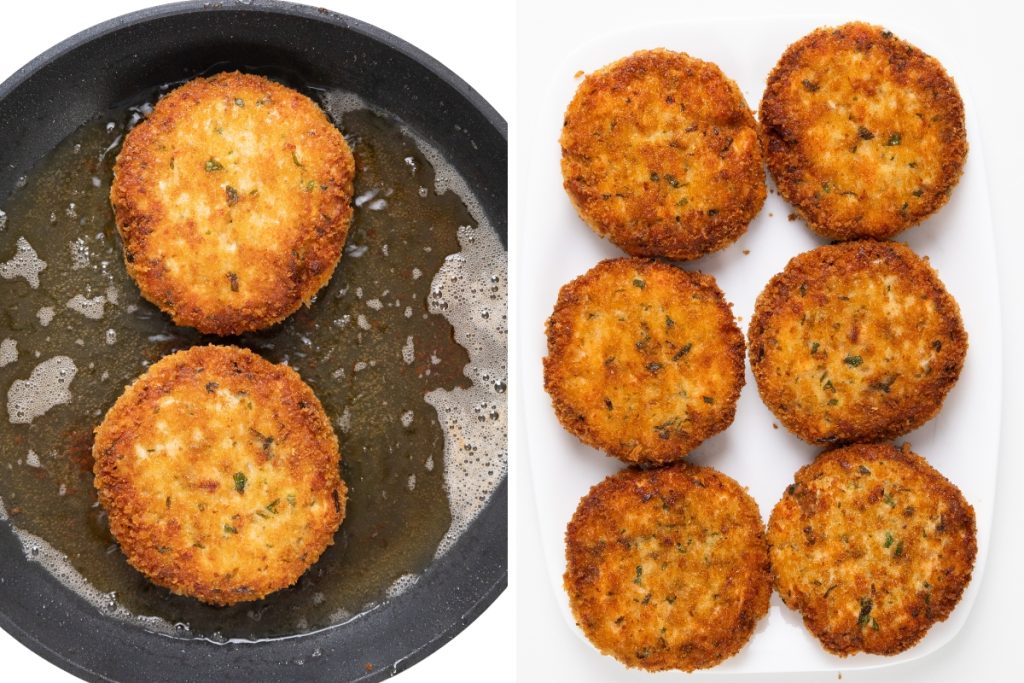
Pan-Fry
Heat the olive oil in a skillet over medium heat. Cook the cakes for 3–4 minutes per side, until golden brown and cooked through. The centers should be firm and opaque.
7
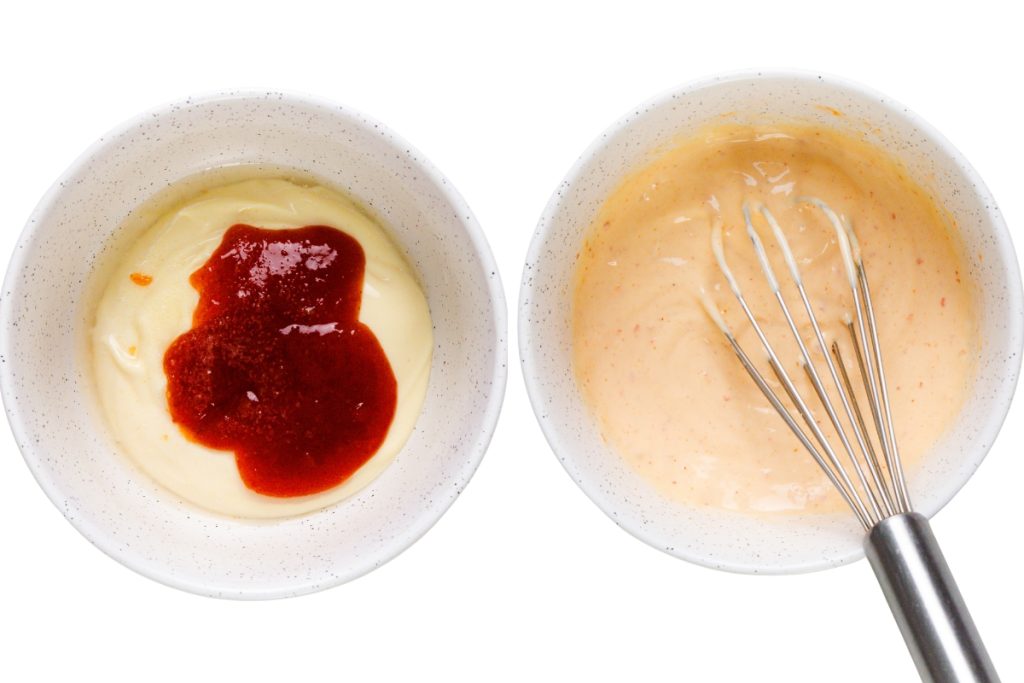
Make The Aioli
Stir together the mayonnaise, sriracha, lemon juice, and a pinch of salt.
8
Serve and Enjoy
Serve the Shrimp and Salmon Cakes fresh from the pan, with a generous dollop of spicy mayo on the side.
Perfect Pairings

Recipe
Shrimp and Salmon Cakes
Ingredients
For the Cakes
- 12 oz raw peeled shrimp (¾ pound) (roughly chopped)
- 6 skinless salmon fillets (about 1¾ lbs total, chopped into small chunks)
- 3 green onions (roughly chopped)
- Zest and juice of 1 large lemon
- 3 tablespoons chopped fresh parsley
- ¾ cup panko breadcrumbs
- 2 large eggs (lightly beaten)
- Salt and pepper (to taste)
- 1½ cups panko breadcrumbs (for breading)
- 3–4 tablespoons olive oil (for pan frying)
For the Spicy Mayo
- ⅓ cup mayonnaise (or Greek yogurt)
- 6 teaspoons sriracha (or your favorite chili sauce)
- 1–2 tablespoons lemon juice (to taste)
- Pinch of salt
Instructions
- Add half the shrimp, half the salmon, the green onions, lemon zest, and half the parsley to a food processor. Pulse until the mixture forms a coarse paste — textured, not smooth. Transfer to a large bowl. Add the remaining chopped shrimp and salmon, remaining parsley, ¾ cup panko breadcrumbs, beaten eggs, lemon juice, salt, and pepper. Mix gently until just combined. The mixture should hold together when pressed; if it feels too wet, add a little more panko, one tablespoon at a time.
- Form the mixture into 6 even patties, about 1 inch thick. Place them on a parchment-lined tray, cover loosely, and refrigerate for 30 minutes. This helps the cakes firm up so they hold their shape in the pan.
- Spread the 1½ cups panko breadcrumbs on a plate. Press each chilled cake into the breadcrumbs to coat both sides evenly, then shake off any excess. Keep the cakes chilled until you’re ready to cook.
- Heat 3–4 tablespoons olive oil in a large nonstick skillet over medium heat. Cook the cakes in batches for 3–4 minutes per side, or until deeply golden, firm to the touch, and cooked through. Adjust the heat as needed so the coating crisps without browning too quickly.
- In a small bowl, stir together the mayonnaise, sriracha, lemon juice, and a pinch of salt. Taste and adjust with more lemon juice or sriracha as needed.
- Serve the shrimp and salmon cakes hot with the spicy mayo on the side.
Tips
Erren’s Top Tips
- Keep the seafood cold while working. Cold seafood holds its shape better and helps the cakes stay firm.
- Don’t over-process the mixture. You want a coarse paste for binding, not a smooth puree.
- If the mixture feels too wet, add panko one tablespoon at a time until it holds together.
- Don’t skip the chill time. It makes the cakes easier to bread, flip, and cook without breaking.
- Cook over medium heat. If the pan is too hot, the panko will brown before the centers cook through.
- Use a thin spatula and flip gently so the cakes stay intact.
Variations & Add-Ins
- Add Old Bay or Cajun seasoning for a more classic seafood-cake flavor.
- Mix in a tablespoon of Dijon mustard for extra depth.
- Add finely diced red bell pepper for sweetness and color.
- Swap the spicy mayo for garlic aioli, tartar sauce, or a lemon yogurt sauce.
Storage & Freezing
Store leftover cooked cakes in an airtight container in the refrigerator for up to 3 days. Reheat in a skillet or oven to help the coating crisp back up. To freeze, place uncooked patties on a tray and freeze until firm, then transfer to a freezer bag or airtight container for up to 2 months. Cook from frozen, adding a few extra minutes per side and lowering the heat slightly if the coating browns too quickly.
FAQs
Can I make these without a food processor?
Yes. Finely chop half the shrimp and salmon by hand until it becomes paste-like, then mix with the remaining chopped seafood and other ingredients as directed.
Why are my seafood cakes falling apart?
They may need more binder, more chilling time, or a gentler flip. Add a little more panko if the mixture feels loose, and chill the shaped cakes until firm before cooking.
Can I bake these instead of frying?
Yes. Bake at 400°F for about 15–18 minutes, flipping halfway through. They won’t be quite as crisp as pan-fried cakes, but they’ll still be delicious.
What sauce goes best with shrimp and salmon cakes?
Spicy mayo is a great match, but tartar sauce, garlic aioli, or a simple lemon yogurt sauce also work well.
Can I make these ahead?
Yes. Shape the cakes, cover them, and refrigerate for up to a day before breading and cooking. Keep them cold until they go into the skillet.


Leave a Reply