This site runs ads and generates income from affiliate links. Read my disclosure policy.
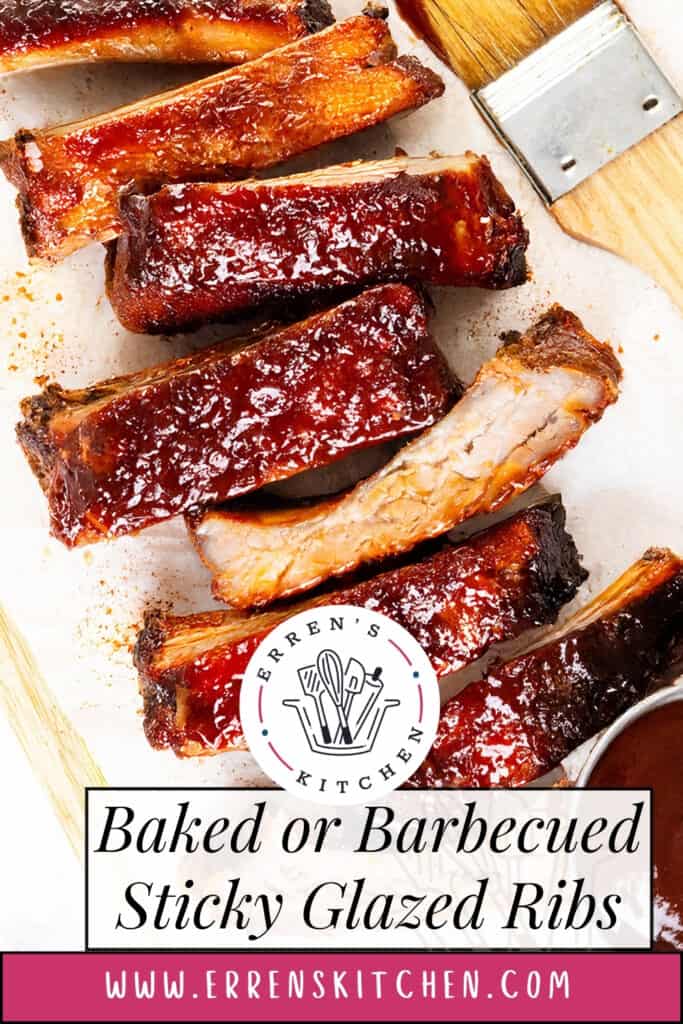
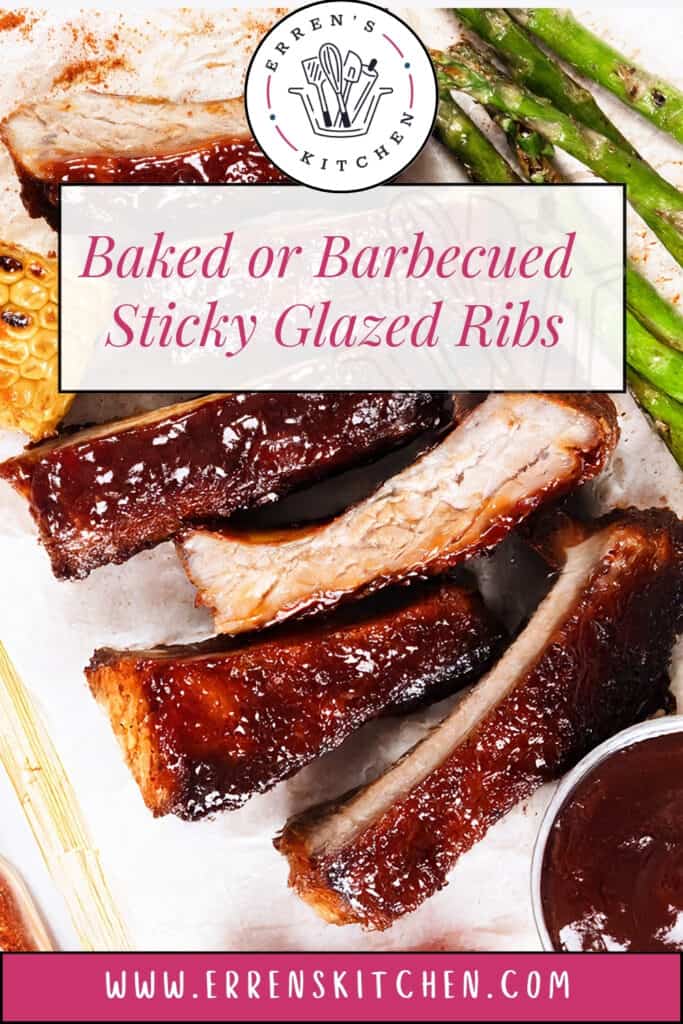
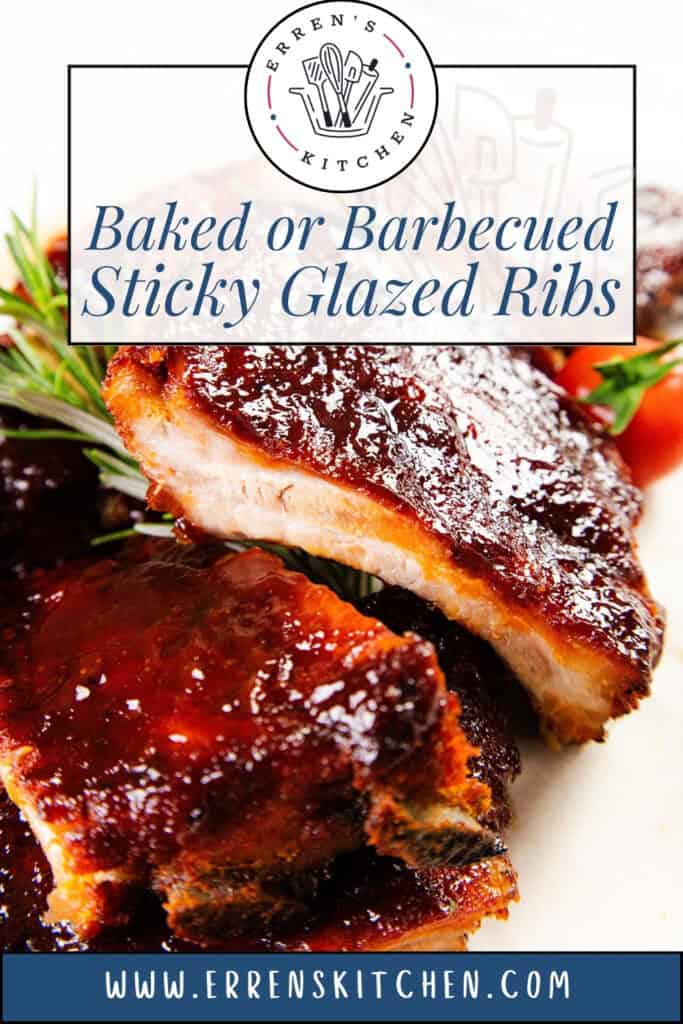
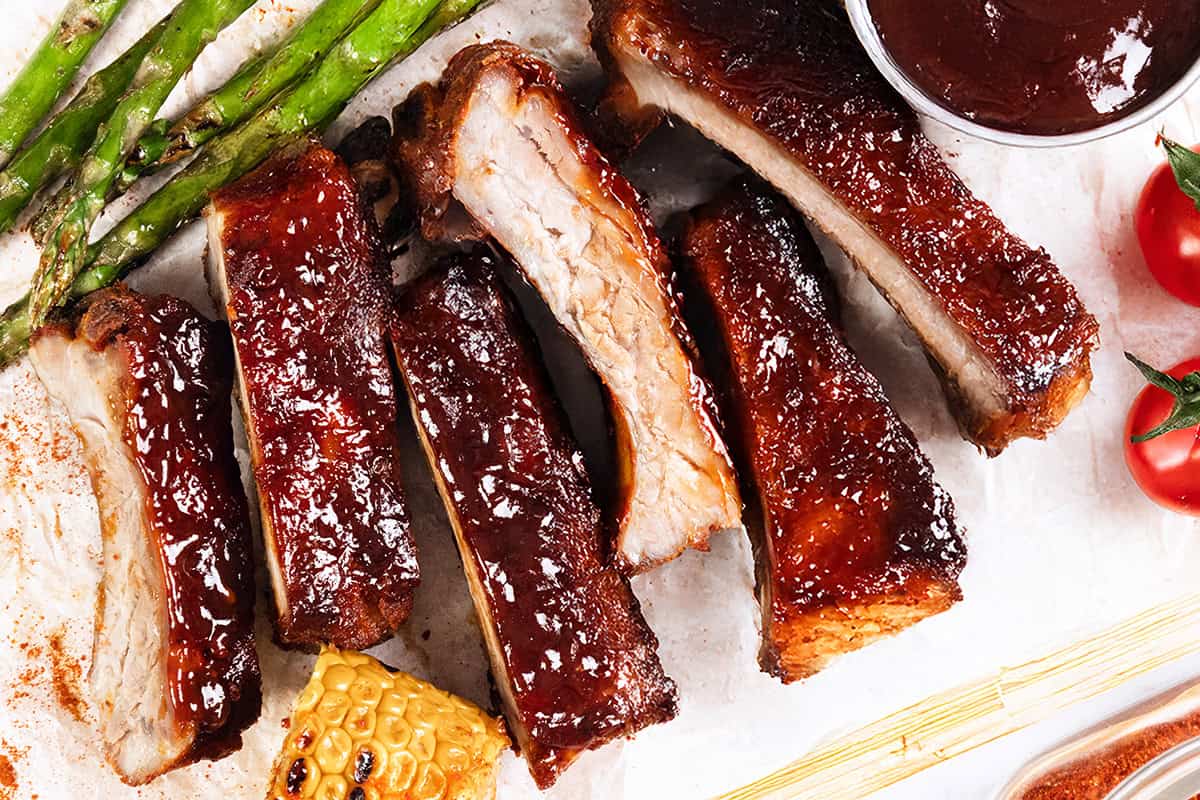
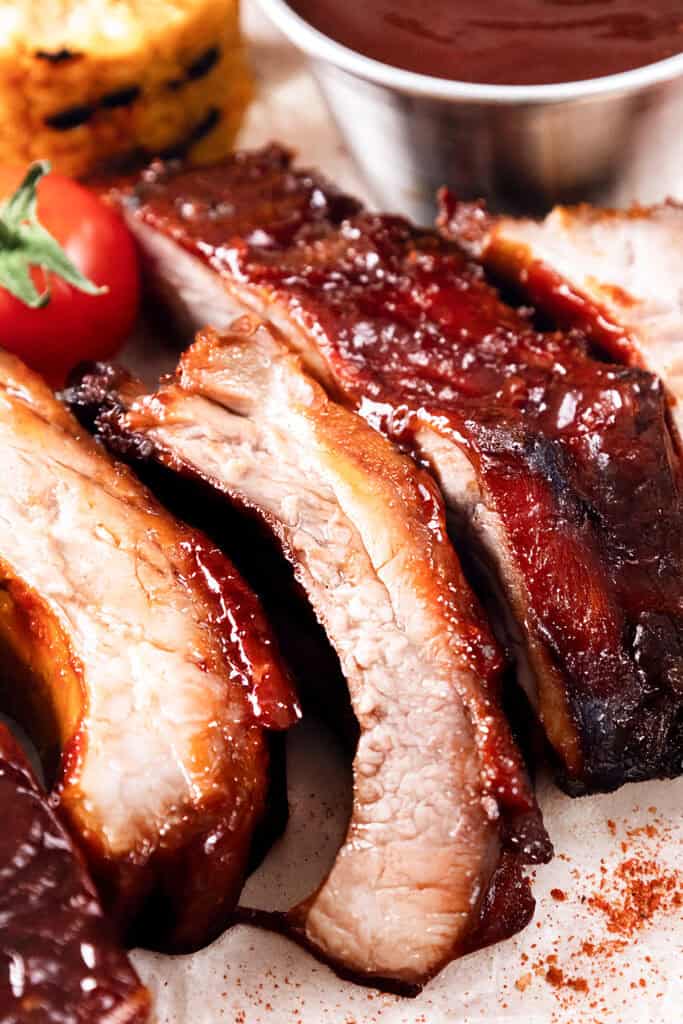
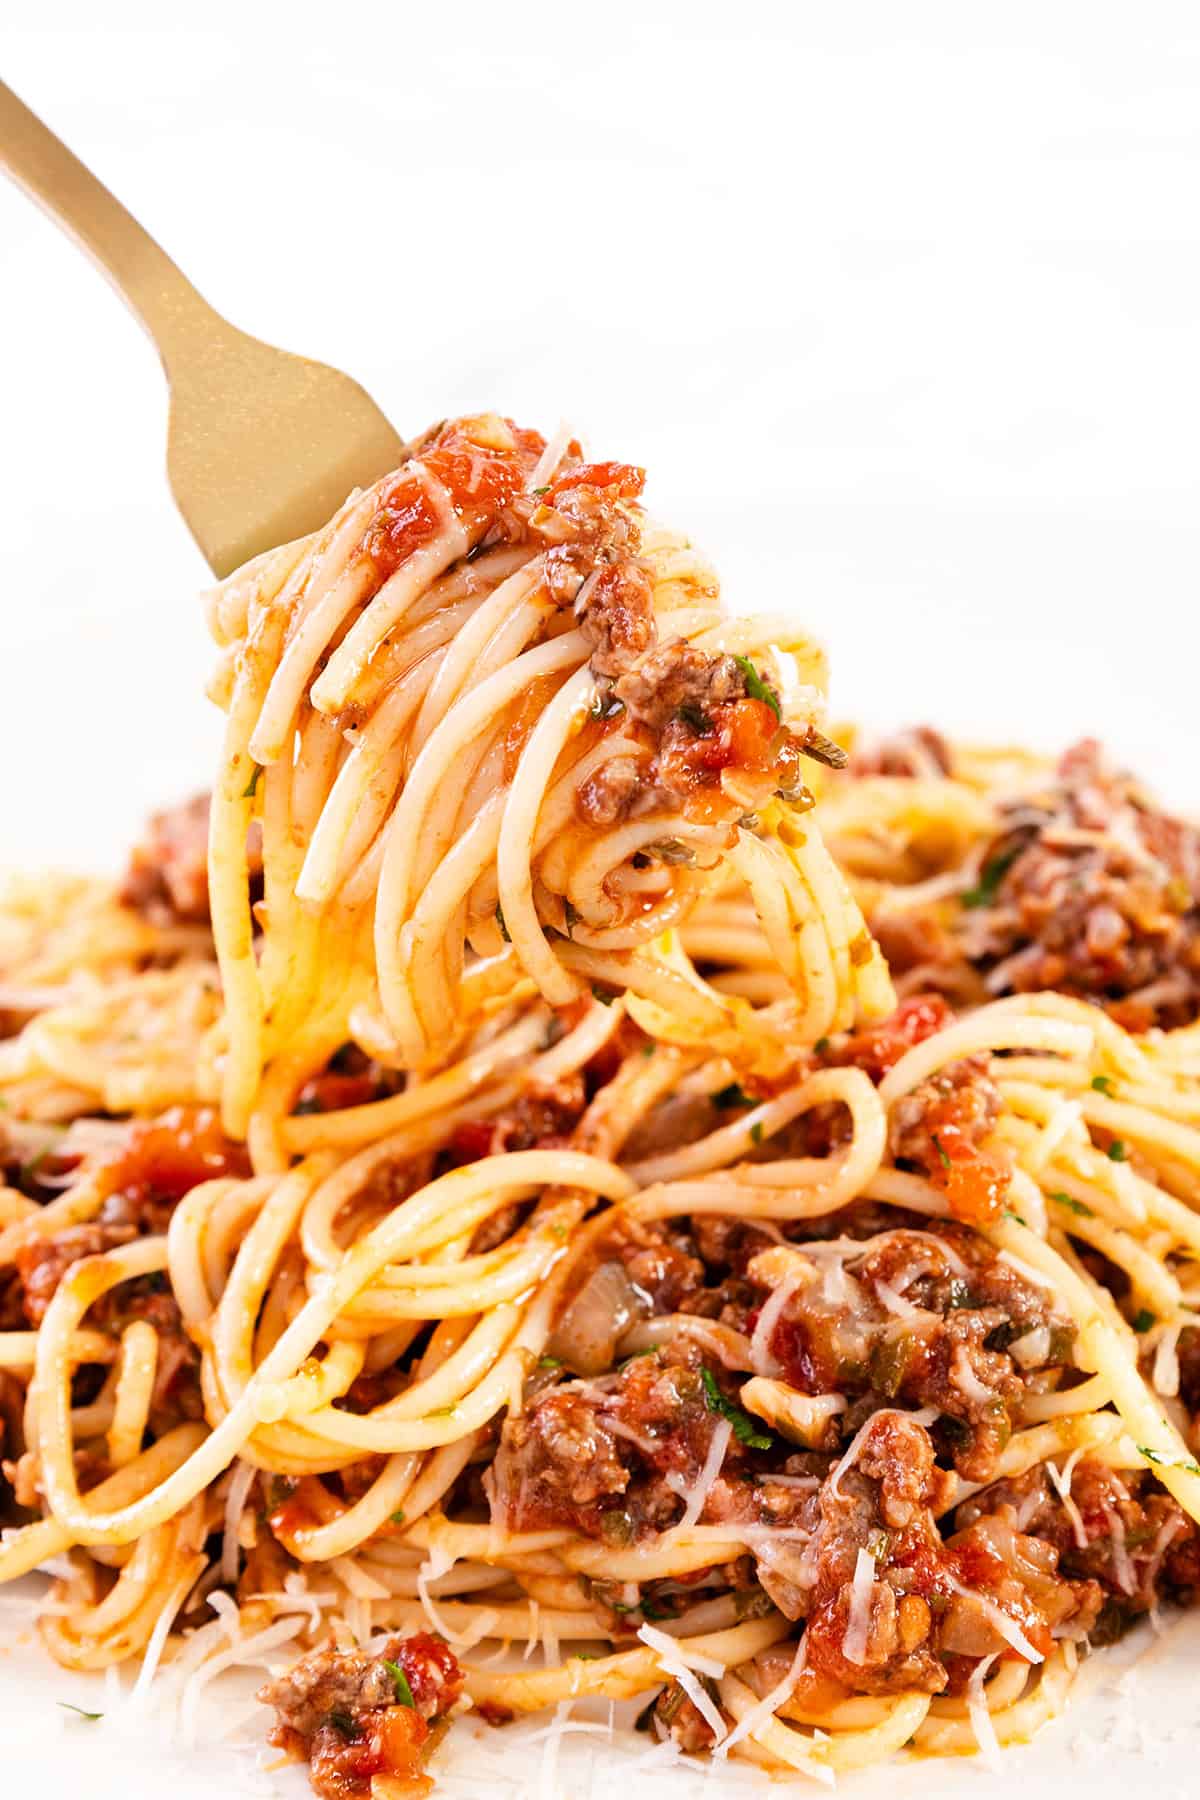
Sweet, smoky, sticky glazed ribs baked or grilled to juicy perfection—easy, bold flavor with a bourbon kick.
Know Before You Scroll

Flavor Profile
Sweet, smoky, sticky, and just a little bold. The glaze is a tangy-sweet mix of ketchup, honey, soy sauce, and bourbon that clings to tender, fall-off-the-bone ribs. Pure BBQ bliss.
Difficulty Level
Easy. The oven does the heavy lifting. Just mix the rub, simmer the glaze, and brush it on. You’ve got this.
What You’ll Need
Spare ribs, smoked paprika, sweet paprika, garlic powder, cumin, ground black pepper, dark brown sugar, salt, ketchup, soy sauce, balsamic vinegar, honey, bourbon, molasses, corn syrup, smoked paprika or liquid smoke, salt to taste.
Equipment Needed
Baking sheet, foil, mixing bowl, saucepan, tongs, basting brush, oven or grill.
Top Tip
For max stickiness, glaze twice. Once at 400°F and again for that final sticky-sweet finish. Want grill marks? Hit them with the BBQ for the last 10 minutes.
Time-Saving Tips
Mix the rub and glaze the night before so you can jump straight into cooking when you’re ready.
Ingredient Swaps
No bourbon? Try apple juice with a splash of vinegar. No liquid smoke? Extra smoked paprika will do the trick.
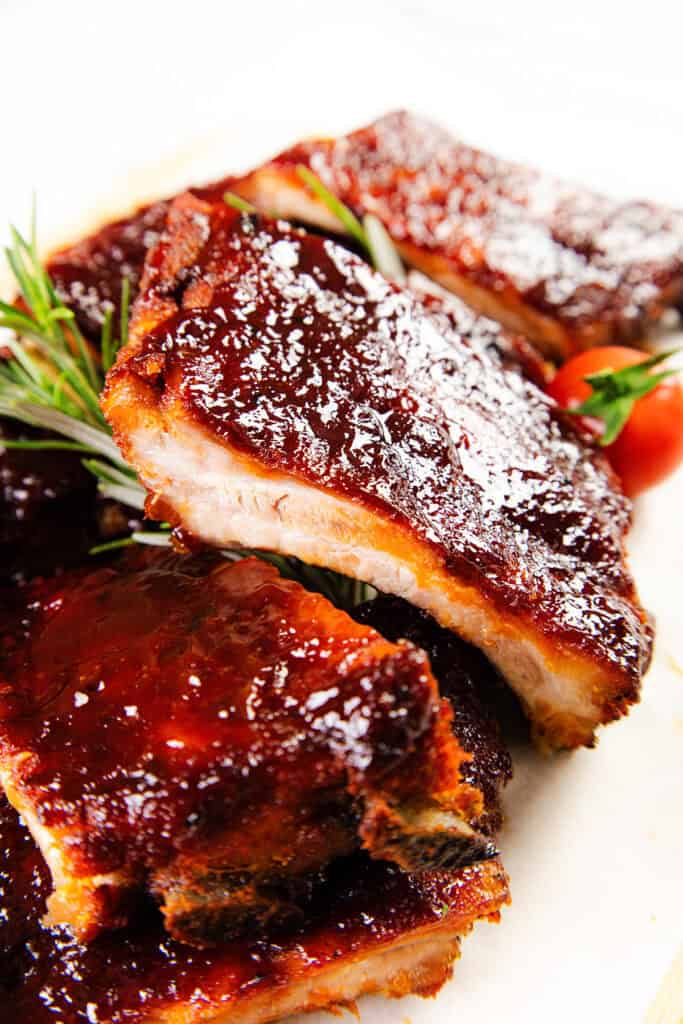
Sticky, Sweet, and Smoky Ribs
I went deep into rib territory for this one. Like, multiple batches, various methods, sauce-splattered stovetop kind of deep. At first, I tried whole racks in the oven—tasted fine, but the flavor didn’t cling the way I wanted. Then I grilled them start to finish, but they dried out before they got tender. Not it. What finally worked? Cutting the ribs before baking, giving them a slow roast under foil to lock in the juices, and then brushing them with this ultra-sticky bourbon glaze that hits every sweet, smoky, tangy note. These baked or barbecued sticky glazed ribs are now a forever favorite—just messy enough to make it fun, and ridiculously easy to pull off.
You can find the full, printable recipe at the top of this post, but you can read the detailed instructions with photos for each step below.
Step By Step Instructions
1
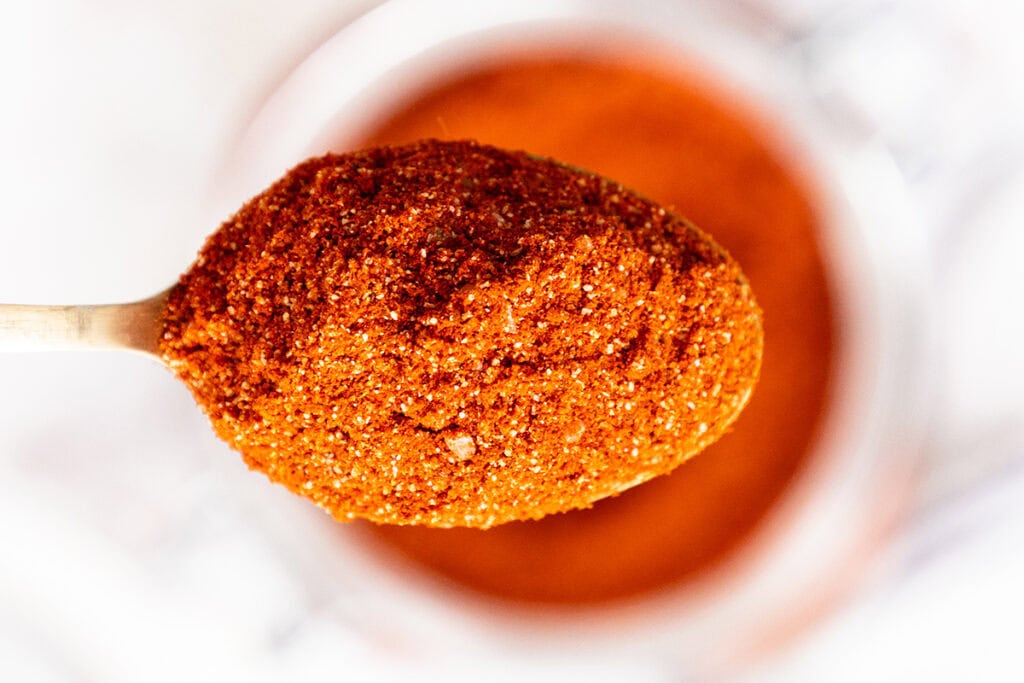
Start with the Rub
Okay, let’s make some seriously sticky, smoky ribs.
In a small bowl, we’re mixing up the rub: smoked paprika, sweet paprika, garlic powder, cumin, black pepper, brown sugar, and a good pinch of salt.
Toss it together and get ready for the magic.
2
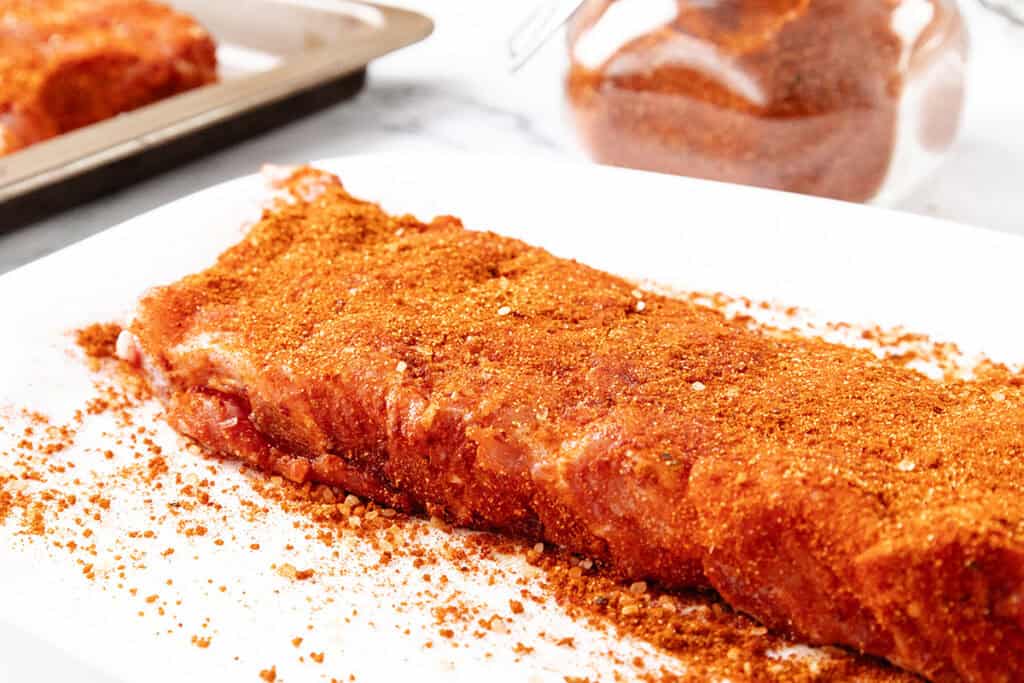
Season the Ribs
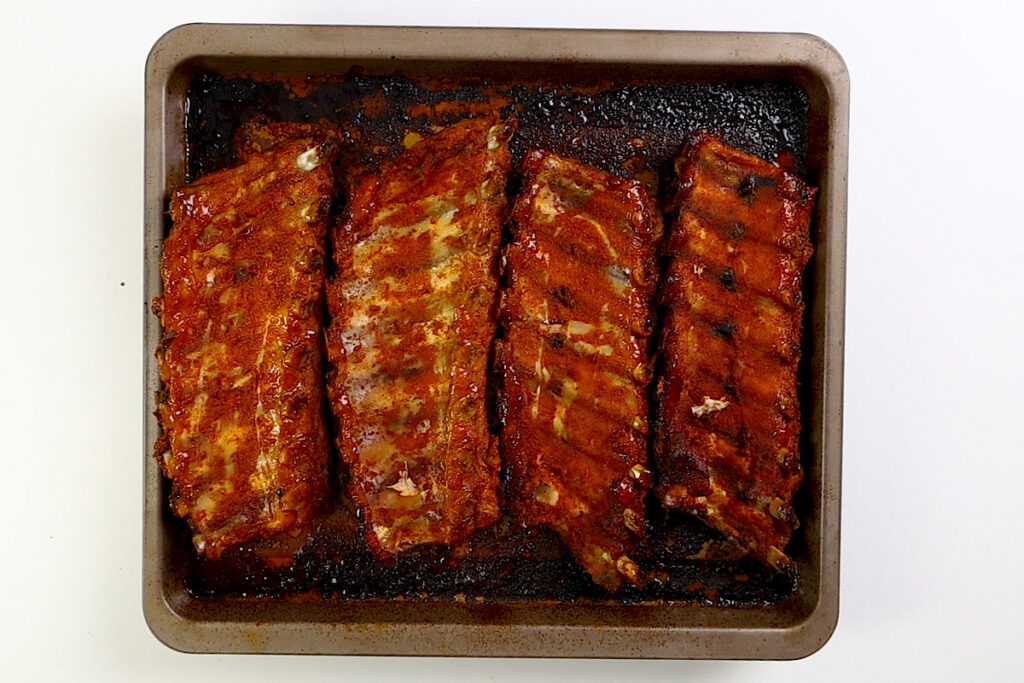
Take your ribs—already cut into individual pieces—and coat them in that rub.
You want every side totally covered. Use your hands, it’s worth it.
Now lay them out on a baking sheet and cover tightly with foil.
3
Bake Low and Slow
Pop those ribs in the oven at 300°F/150°C.
They’ll bake low and slow for about 2 to 2½ hours until they’re tender and juicy.
4
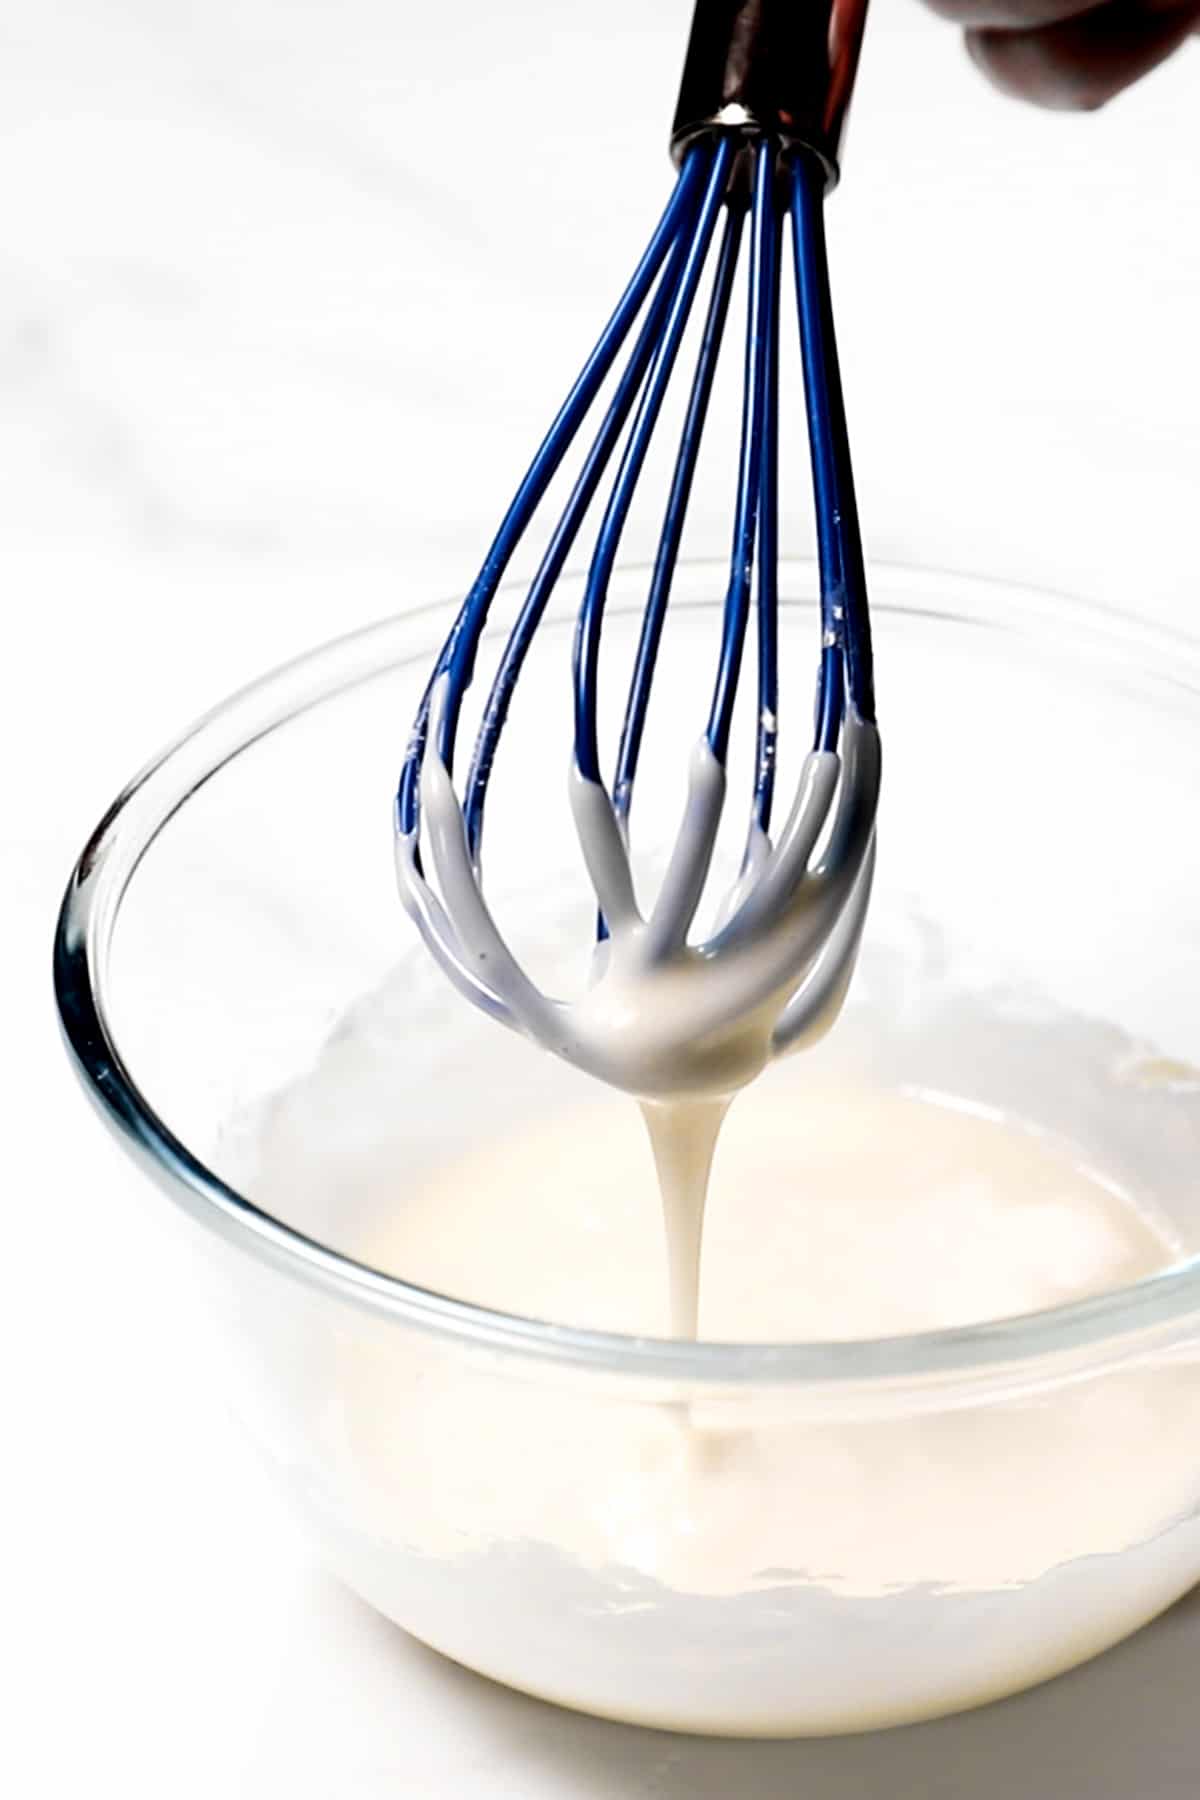
Make the Glaze
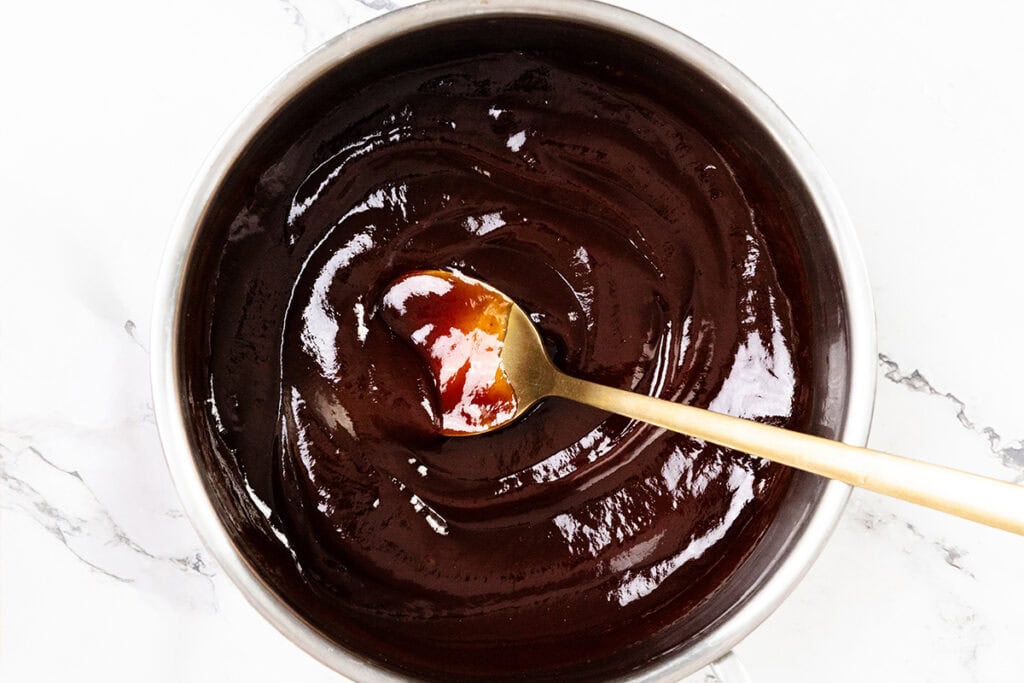
While those ribs are baking, let’s make the glaze.
Grab a saucepan and add ketchup, soy sauce, balsamic vinegar, honey, bourbon, molasses, corn syrup, and a little smoked paprika—or liquid smoke if you’ve got it.
Simmer that over medium heat for about five minutes until it thickens into a glossy, sticky dream.
Taste and add salt if it needs it. Then set it aside.
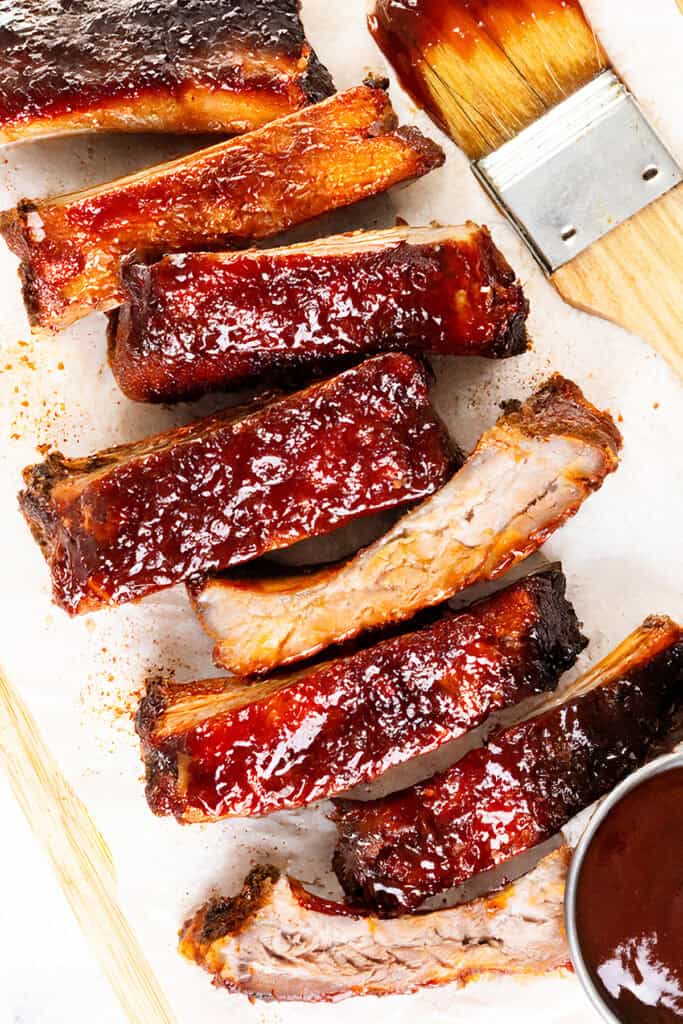
5
Glaze and Grill (or Bake)
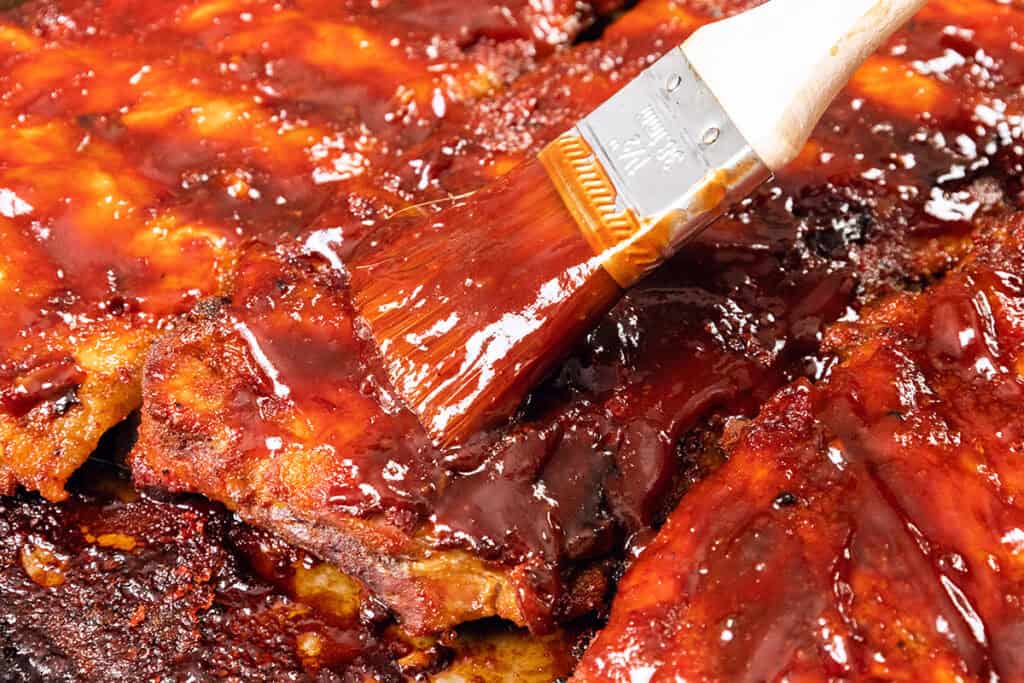
Once the ribs are done baking, you’ve got two choices.
Fire up the grill, dip the ribs in the glaze, and give them 10 to 15 minutes over medium heat, brushing with more glaze as they cook.
Or go the oven route: crank the heat to 400°F/200°C, dip each rib in the glaze, and roast for 10 minutes.
Pull them out, glaze one more time, and pop them back in for another 10 to 12 minutes until they’re sticky and caramelized.
6
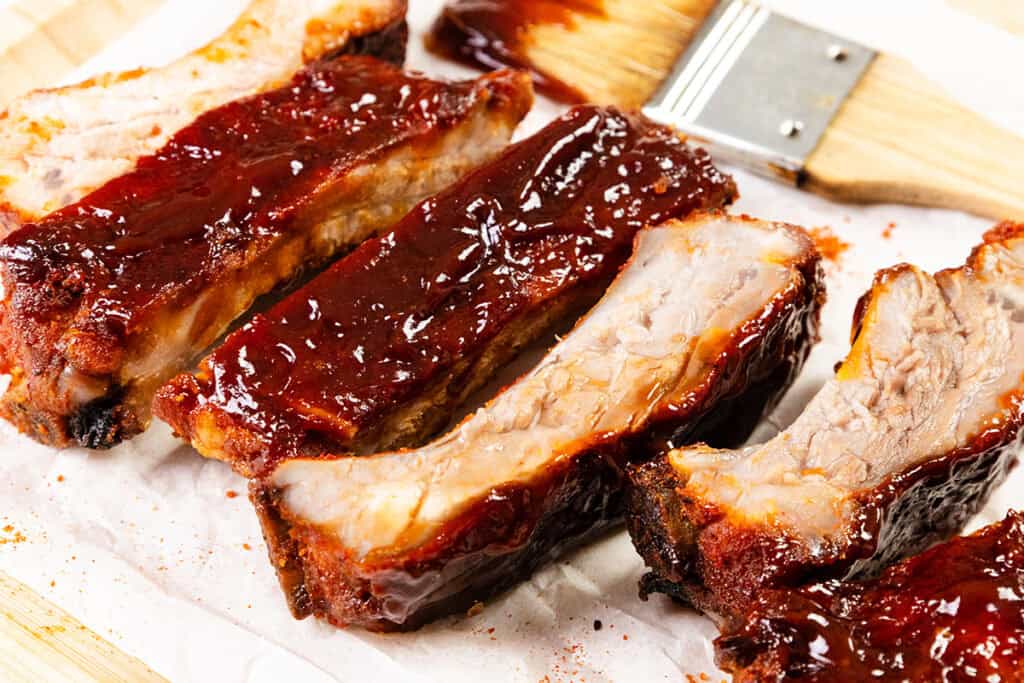
Time to Eat
Pull them out, let them rest for a hot minute, and serve ‘em up warm.
Sticky, sweet, smoky ribs with a little bourbon kick. Total crowd-pleaser.
Perfect Pairings
FAQs
Can I make these ribs without alcohol?
Yes! Just swap the bourbon for apple juice with a splash of cider vinegar or even use orange juice. You’ll still get a great balance of sweet and tangy.
Should I use baby back ribs or spare ribs?
This recipe uses spare ribs, which are meatier and a bit fattier—great for slow baking. Baby backs can work too but may cook slightly faster and be a bit leaner.
Can I cook the ribs entirely on the grill?
You can, but you’ll need to use indirect heat and keep the grill covered to mimic oven conditions. Finish with direct heat after glazing for that sticky char.
What’s the best way to reheat ribs?
Reheat in a 300°F oven, covered loosely with foil. You can also brush on more glaze before reheating to keep them moist and sticky.
Do I need to remove the membrane from the ribs?
Since this recipe calls for cutting the ribs individually before baking, you don’t need to worry about removing the membrane—it’s already separated and won’t affect texture.
Can I make the glaze ahead of time?
Absolutely! The glaze keeps well in the fridge for up to 1 week. Just warm it gently before using so it spreads easily.
How do I know when the ribs are done?
The meat should be fork-tender and pulling away from the bone. You can also check with a meat thermometer—about 190–203°F internal temp is ideal for tenderness.
Rate This Recipe

Recipe
Baked or Barbecued Sticky Glazed Ribs
Ingredients
- 4 lbs spare ribs (cut into individual ribs)
For the Rub
- ⅛ cup smoked paprika
- ⅛ cup sweet paprika
- 1 tablespoon garlic powder
- 1 teaspoon cumin
- 1 teaspoons ground black pepper
- 5 teaspoons dark brown sugar
- 1 tablespoon salt
For the Glaze
- ⅔ cup ketchup
- 3 tablespoons soy sauce
- 1 tablespoon balsamic vinegar
- ½ cup honey
- 5 tablespoons bourbon
- 1 teaspoon molasses
- 1 teaspoon corn syrup
- 1 teaspoon smoked paprika (or liquid smoke to taste)
- salt (to taste)
Instructions
- Preheat oven to 300°F/150°C
- In a small bowl, mix the spices for the rub.
- Cover the ribs with the rub so they’re coated all over.
- Place the ribs on a baking tray, and cover the pan with foil and bake for 2 to 2½ hours, until tender.
- Meanwhile, to make the glaze, add all the ingredients to a saucepan, stir well and bring the mixture to a simmer.
- Simmer for 5 mins until thickened and sticky, taste for seasoning, and add salt to taste, then remove from the heat and set aside until needed.
- At this point, they can be dipped in the glaze and grilled on the BBQ for 10-15 minutes (brushing with the glaze again as needed)
To Bake
- When the ribs are done, remove from the oven and increase the heat to 400°F/200°C.
- Using a pair of tongs, dip each rib in the glaze, then return to the rack.
- Place the ribs back in the oven and cook for 10 mins.
- Remove from oven, dip into the glaze again, then return to the oven for another 10-12 minutes until sticky.
- Serve hot.
Tips
Erren’s Top Tips
Use individual ribs for more flavor.Cutting the ribs before baking means every piece gets coated in rub and later dunked in that amazing glaze—way more flavor, way more sticky goodness. Cover tightly with foil.
Don’t skip this step when baking. The foil traps steam and helps the ribs cook low and slow, making them juicy and tender without drying out. Low and slow is the name of the game.
Keep that oven at 300°F. It might feel like forever, but the result is meat that falls off the bone with zero fuss. Simmer the glaze just until thick.
Overcooking the glaze can make it too stiff to brush on. You want it syrupy and glossy—just enough to cling to the ribs without being gummy. Double-glaze for the win.
Glaze once, bake or grill, then glaze again. This is how you build that shiny, sticky coating everyone loves. Grilling? Watch closely!
The sugar in the glaze can burn quickly, so don’t walk away. Flip and brush every few minutes to keep the ribs charred, not scorched. No bourbon? No problem.
You can sub with apple juice plus a tiny splash of vinegar. It won’t be quite the same, but it still brings a delicious tangy sweetness.
Storage & Freezing Instructions
To Store:Let the ribs cool completely, then transfer them to an airtight container. Store in the fridge for up to 4 days. Reheat in a 300°F oven or in the microwave with a splash of water to keep them moist. To Freeze:
Wrap ribs tightly in foil or freezer-safe bags. Freeze for up to 3 months. To reheat, thaw overnight in the fridge, then warm in the oven at 300°F until heated through. Brush with a fresh layer of glaze before serving to revive that sticky finish.
Update Notes: This post was originally published in July of 2015, but was republished with a video, new photos, and an updated post in July 2025.


Leave a Reply